Refining Preexisting Meshes
The -r switch causes a mesh (.node and .ele files) to be read and refined. If the -p switch is also used, a .poly file is read and used to specify edges that are constrained and cannot be eliminated (although they can be divided into smaller edges) by the refinement process.
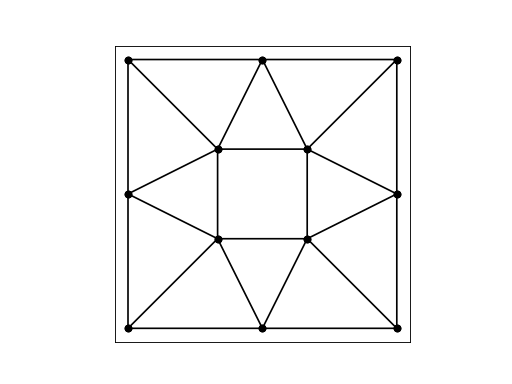
When you refine a mesh, you generally want to impose tighter quality constraints. One way to accomplish this is to use -q with a larger angle, or -a followed by a smaller area than you used to generate the mesh you are refining. In order to simplify the maintenance of a sequence of successively refined meshes, all files written by Triangle have iteration numbers in their filenames; the iteration number of each mesh is one greater than that of the mesh it was created from. In the example below, the input mesh (which you saw created on the Delaunay triangulation page) has iteration number one, and consists of the files box.1.node and box.1.ele.
(Source code, png, hires.png, pdf)

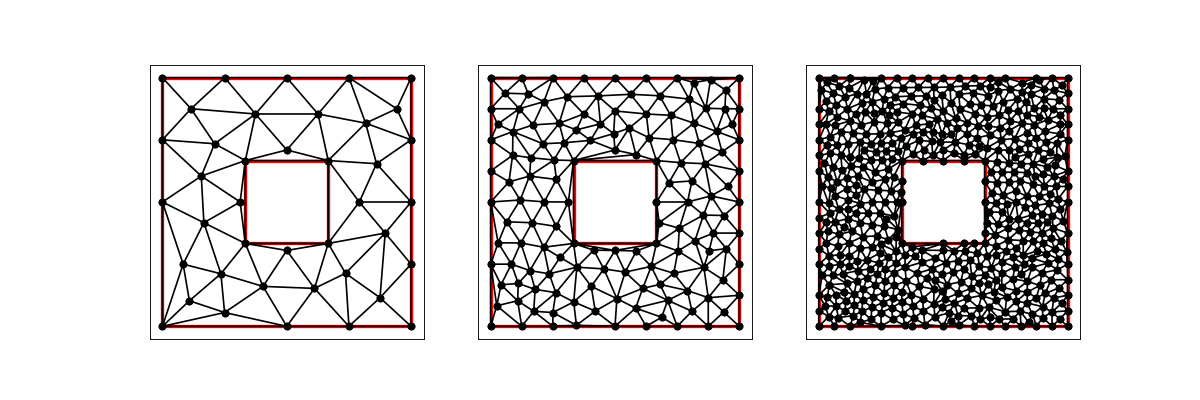
This mesh is refined with an area constraint of 0.2, creating a new mesh with iteration number two. Repeating the process with smaller area constraints, iterations three and four are also created.
triangle -rpa0.2 box.1
triangle -rpa.05 box.2
triangle -rpa.0125 box.3
(Source code, png, hires.png, pdf)

Above, the -p switch is used to retain segment information. At each iteration, a .poly file is read and used to specify edges that are constrained and cannot be eliminated (although they can be divided into smaller edges) by the refinement process. In this example, it didn’t make any difference because the mesh has no interior boundaries; however, in a mesh with interior boundaries, the -p switch is necessary to maintain these boundaries during refinement; hence, you should make a habit of using it whenever refining a mesh that was originally formed from a PSLG. If you forget, the information about interior segments will be lost for all future iterations.
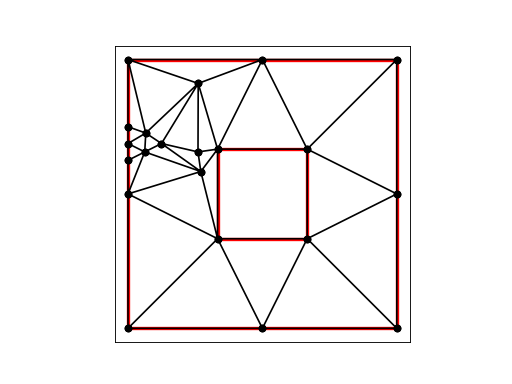
You can perform finely controlled refinement by creating an .area file, which specifies a maximum area for each triangle, and use the -a switch (without a number following). Each triangle’s area constraint is applied to that triangle. The constraints in an .area file are typically based on a posteriori error estimates resulting from a finite element simulation on that mesh. In the example file box.1.area, one triangle has been constrained to have area no greater than 0.02; all other triangles are left unconstrained (by assigning them negative areas).
triangulate(bbox1, 'rpa')
(Source code, png, hires.png, pdf)
